

How To Create A Store Tab On Wordpress Blog Woo
WordPress was not designed initially to create eCommerce stores. It was envisioned as a Content Management System for websites.
That's where WooCommerce comes in.
WooCommerce is a plugin that can turn a WordPress website into a professional eCommerce store. It is the most popular eCommerce solution for WordPress and probably the most feature-rich eCommerce plugin available.
In this tutorial, we're going to learn how to set up a WooCommerce store.
It's very straightforward, as the plugin walks you through most of the process. Even so, WordPress beginners may need some help dealing with shipping settings, payment processors, and other details.
That's where this guide comes in.
Properly installing and configuring WooCommerce will save you a lot of troubleshooting in the future. You need to get your store's settings right first time in order to promote your products and generate income!
Before we get started, we'll look at what WooCommerce is and the requirements to get it up and running. After that, we'll walk you through the steps to set up a WooCommerce store.
- What Is WooCommerce?
- Is WooCommerce Free to Use?
- How to Set up WooCommerce
- Wrapping Up
What Is WooCommerce?
WooThemes initially launched WooCommerce in 2011. In 2015 Automattic, the creator of WordPress bought it.
Since then, WooThemes became WooCommerce, more features were added and the plugin became a titan among online stores.
This plugin is very powerful and flexible. You can sell almost anything with it.
WooCommerce boasts over 5 million active installations and a 4.5 user rating on WordPress.org.
WooCommerce is ideal if you want to:
- Have total control over your online store – With proprietary platforms like Magento, you have limited options for modifying the code. For example, the additional tags on the header. WooCommerce allows you to edit, customize, and manage everything.
- Have an online store that hosts blog pages – WordPress offers the best blog editor in the world. You can also create other pages alongside your store.
- Don't want to pay a monthly subscription or commissions – Store owners have to pay commission in proprietary platforms like Shopify. WooCommerce is free.
- Start small and build an online store that can scale up in the future – WooCommerce allows you to create both simple and complex stores. You can have payment management tools, such as Amazon Payments, or implement SSL for better performance.
Choosing WooCommerce is one of the best decisions you could make when creating an online store!
Is WooCommerce Free to Use?
WooCommerce is an open-source plugin that converts WordPress websites into online stores. It is free to download and use on any WordPress website. There are premium plugins but they are completely optional.
Running your online store isn't cost-free. You will need to pay for domain and hosting to run it. You also need to account for branding, marketing and advertising costs.

Hello! My name is Sujay and I'm CEO of Astra.
We're on a mission to help small businesses grow online with affordable software products and the education you need to succeed.
Leave a comment below if you want to join the conversation, or click here if you would like personal help or to engage with our team privately.
How to Set up WooCommerce
Setting up WooCommerce is simple. The plugin comes with a setup wizard that walks you through the basics to get you started.
Let's just cover setup anyway, just in case.
Here is an overview of the steps you need to follow:
1. Install WooCommerce
If it is your first time setting up an online store, we recommend that you start by installing WordPress with a default theme and no plugins. This will minimize the chances of compatibility issues with WooCommerce in the long run.
The first thing you need to do is to install the WooCommerce plugin. It can be installed for free from the WordPress repository or uploaded directly to your WordPress site.
To download it directly to your site, access your WordPress dashboard, move to the Plugins tab, and select Add New. On the search bar, add the keyword 'WooCommerce'.
Click on Install Now when the plugin appears. The plugin author should be Automattic, as you can see from the screenshot below:
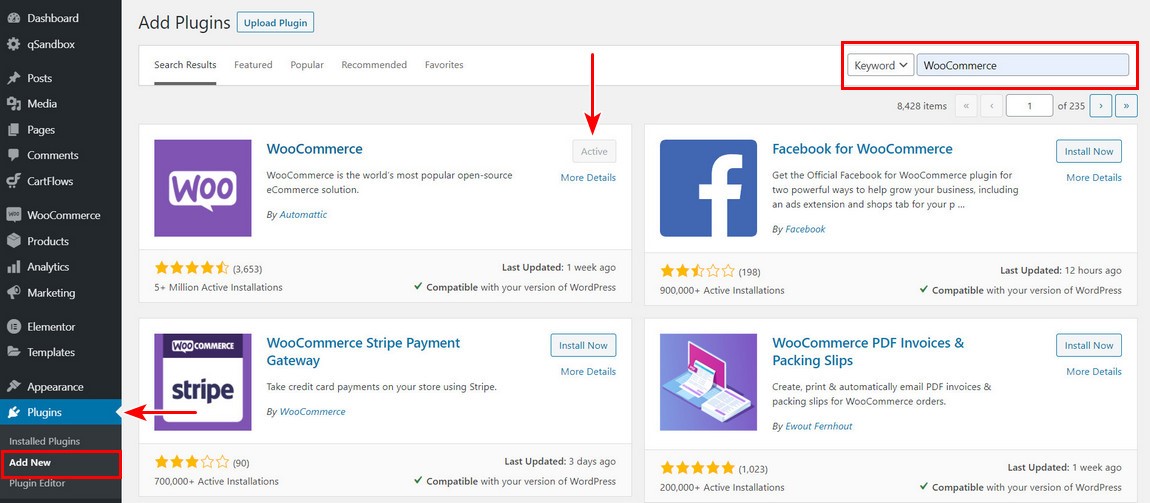
When it's ready, click on the Activate button. Once the process is complete, WooCommerce will launch the configuration wizard.
2. Access the Setup Wizard
The wizard will help you set up your store's key settings. Let the wizard be your guide.
It is optional, but we recommend going through these initial steps to configure the important setting on your store.
The first page of the setup wizard starts with some basic questions about your store:
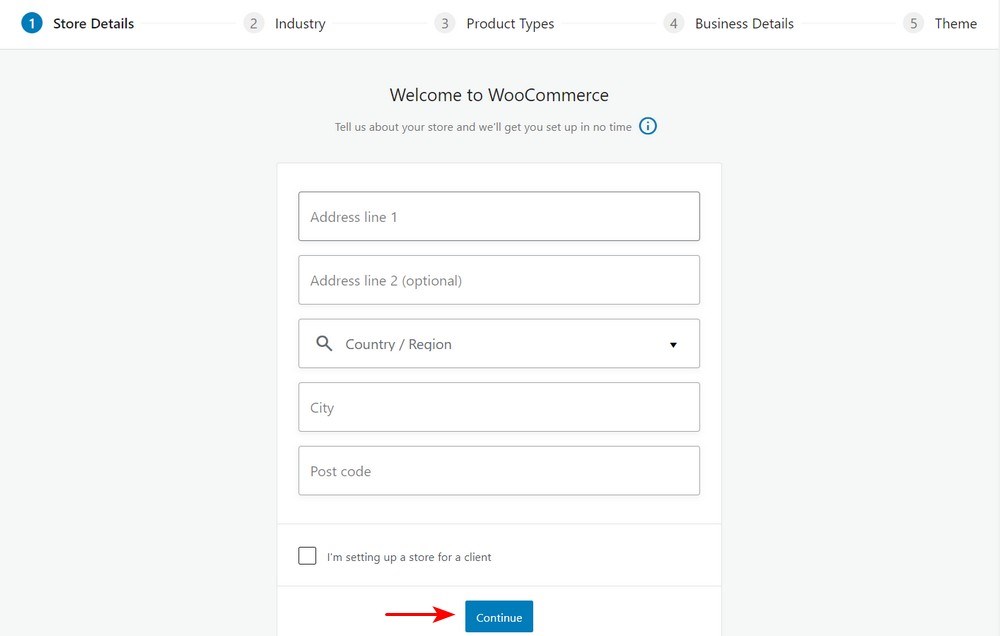
You are required to enter some basic information. This information includes your store's address, your country, and whether you're setting up for a client.
You should note that anything you set on the wizard can be changed later on the WooCommerce settings page if necessary.
3. Choose the Industry
Here you'll add the industry your store operates in, and click on continue:

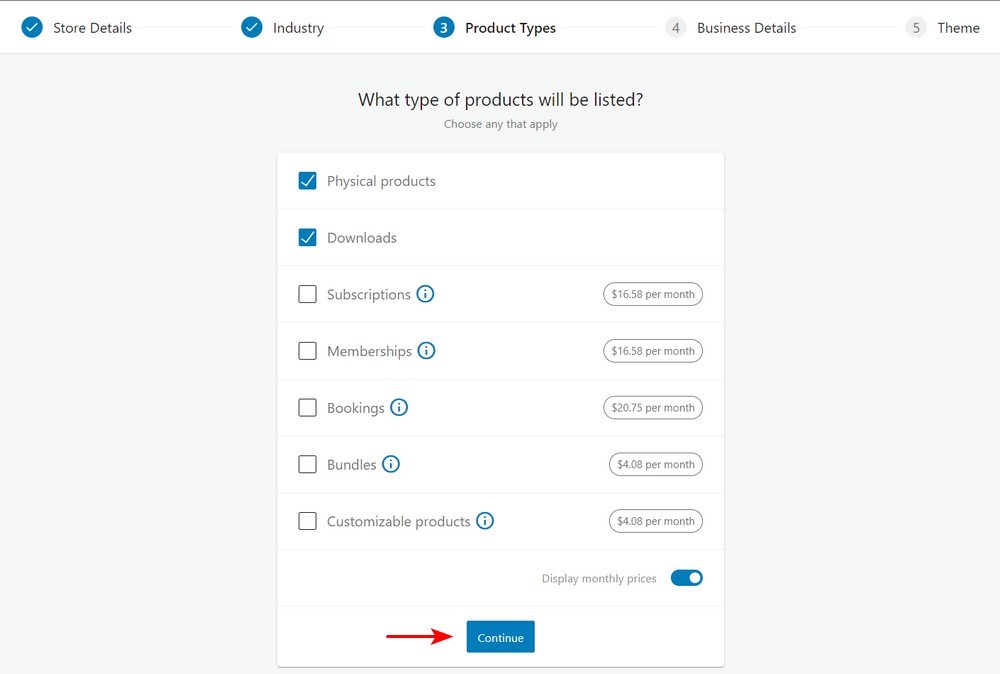
4. Choose the Product Type
The next step is to set the product type and whether you plan to sell digital or physical products.
Alternatively, you can pay an extra amount if you want to have subscriptions, memberships, bookings, bundles, or customized products. They are premium only:
5. Business Details
On the next screen, you are required to add some information about your business. Select the number of products you plan to display.
You also need to state if you are selling products on another platform:
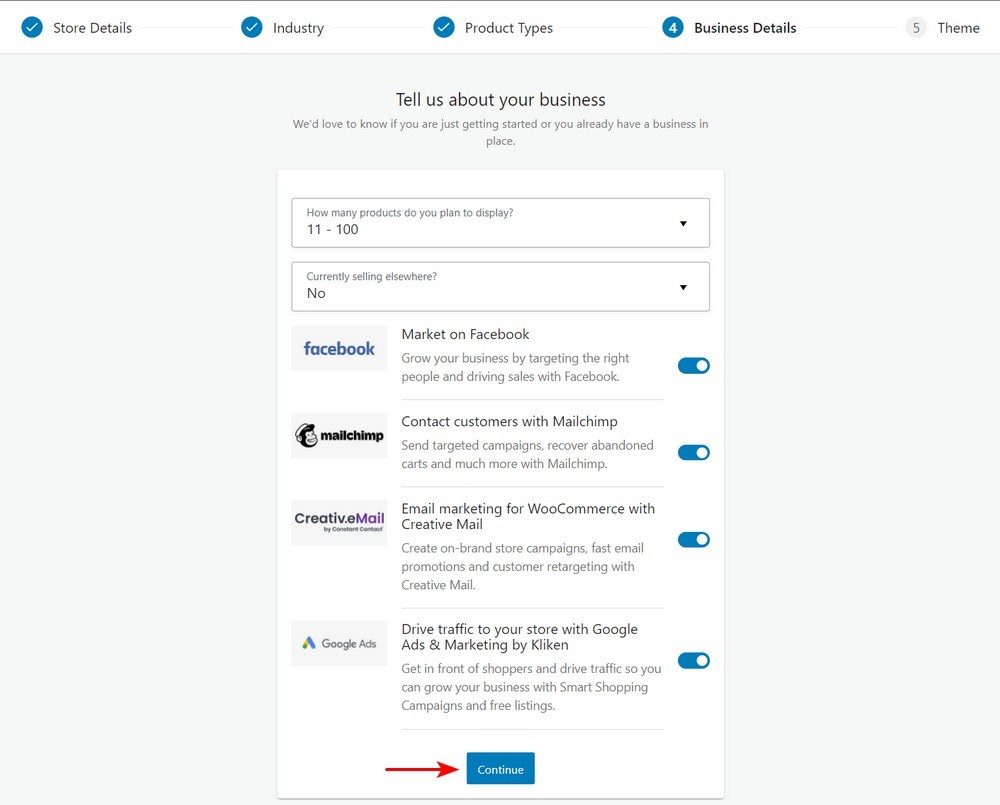
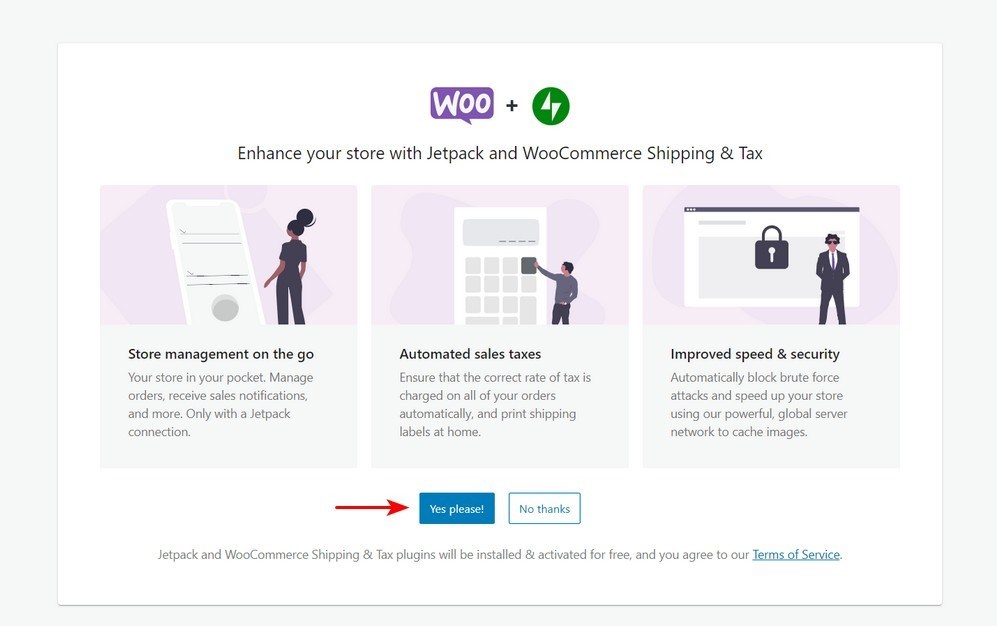
After that, you'll be presented with a few optional add-ons, as shown above. These tools come in handy, although none of them are required to run your eCommerce store.
6. Choose the Theme
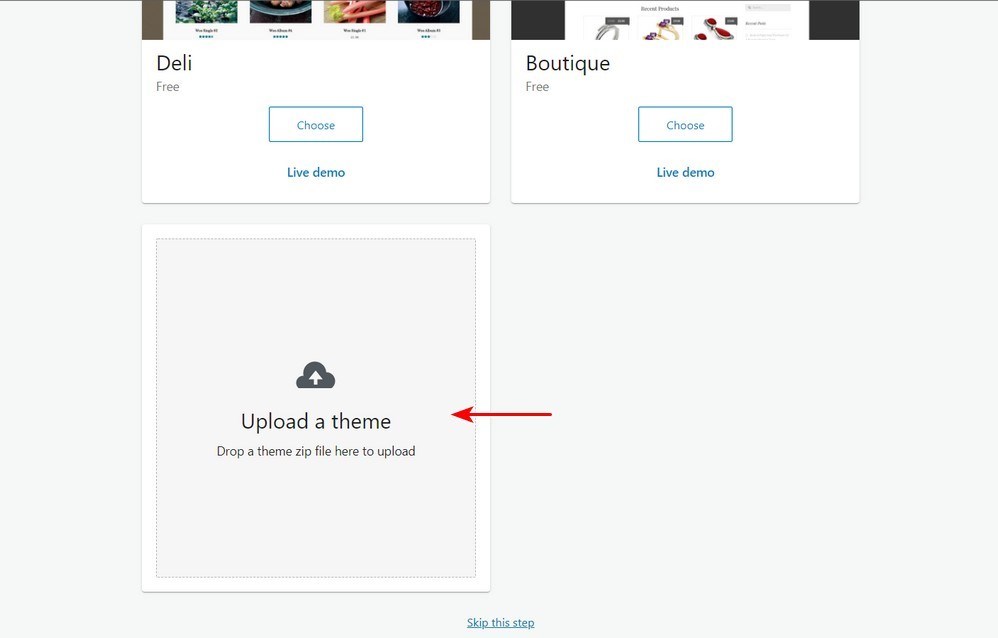
The next step is to choose a theme to display your products. There are many themes, both free and paid, that are available for WordPress.
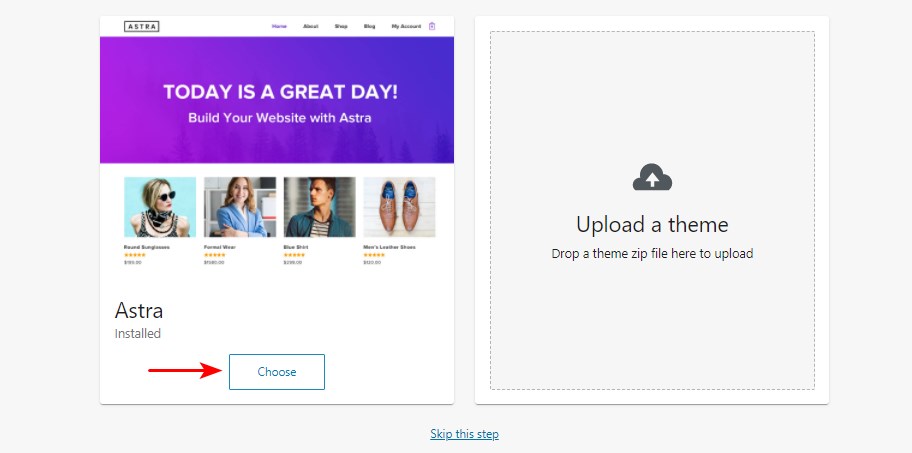
We recommend downloading the Astra theme or purchasing the Astra pro theme then uploading it in this section:
After uploading it, click on the 'choose' button:
Astra is developed by Brainstorm Force, which has been in operation for more than ten years.
The theme has more than 1 million downloads and a consistent 5-star rating due to excellent customer support. This theme stands out because it integrates with page builders so effectively, fast loading and the number of superb quality templates.
We have launched the Ultimate Add-ons for Beaver Builder and Ultimate Add-ons for Elementor plugin extensions, which are ideal for online stores. It integrates seamlessly with page builders such as Beaver Builder, WPBakery Page Builder, Thrive Architect, Elementor, Divi Builder, Brizy, and Gutenberg.
7. Install the Jetpack Plugin (Optional)
Jetpack is an all in one WordPress plugin that offers a range of features. It includes analytics, security functionality, and a whole lot more.
It is an optional addition, so it's up to you to decide whether you want to install it.
You need a WordPress.com account, for Jetpack to work.
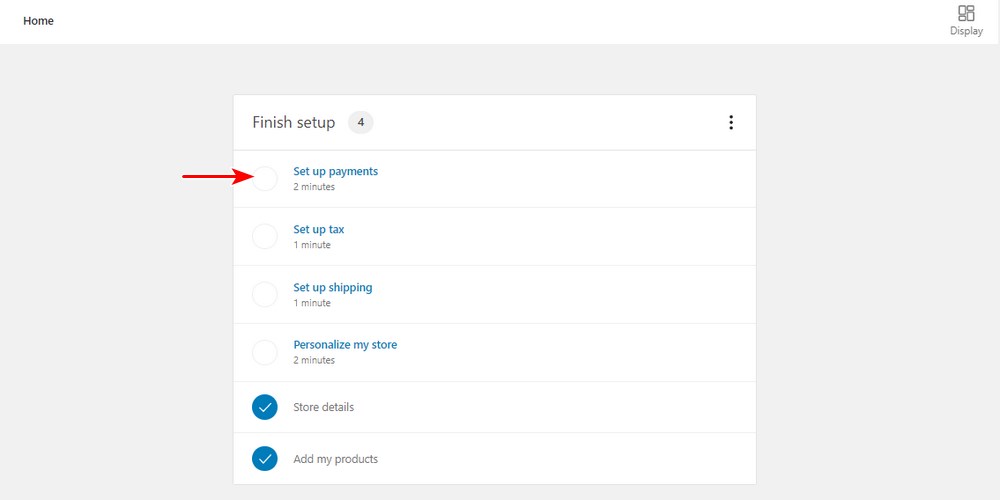
After that, you will be redirected to the WooCommerce store's online HQ:
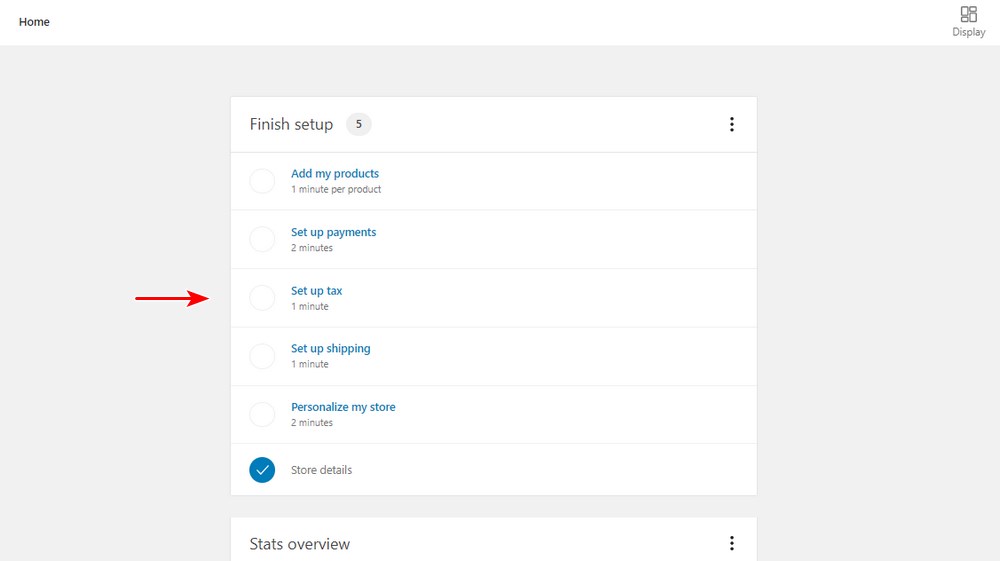
From the screenshot, you can see that the setup is not quite complete. You are now required to add products, set up payments, set up tax, and set up shipping details.
8. Add Products
You can add products manually, import, or migrate:
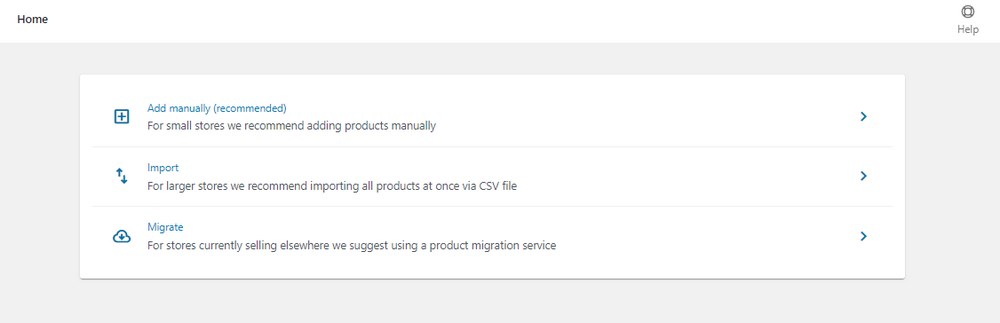
Since you are starting a new store, we recommend adding the products manually. Now you need to configure everything concerning the product.
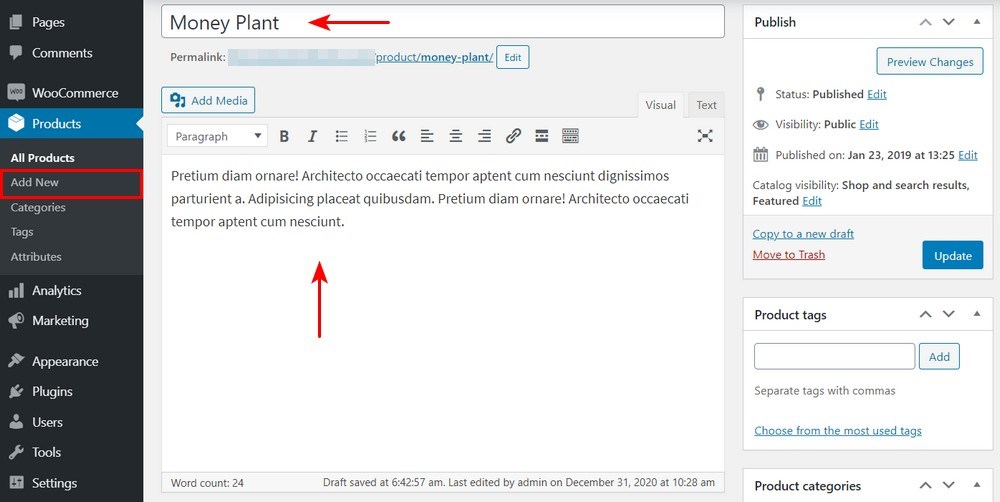
Add the Title and Description of the Product
Enter the name in the title section. Next, you need to add a long description that explains the features and benefits of the product.
Choose the Product Type
Choosing the product type depends on what you are selling. By default, WooCommerce allows you to choose different product types. It offers you four core product types.
They are:
- Simple products
- Grouped products
- External or affiliate products
- Variable products
There are two more options to modify the four core product types:
- Virtual – Use this option if you are selling an online digital product that does not require a shipment.
- Downloadable – Enable this option if the downloadable file is associated with the product.

After you have selected the product type, fill in the rest of the details in the Product data box. To navigate between different sections, use the tabs on the left when adding the product details depending on your store's needs.
9. Set up Payments
After you have added all your products, go back to WooCommerce > Home. Click on 'Set up payments':
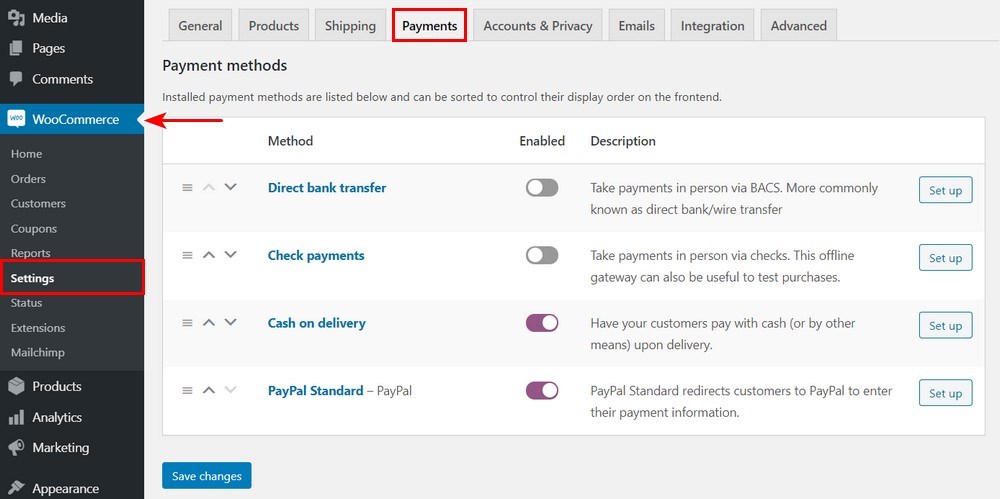
You are required to select which payment processor you want your store to use.
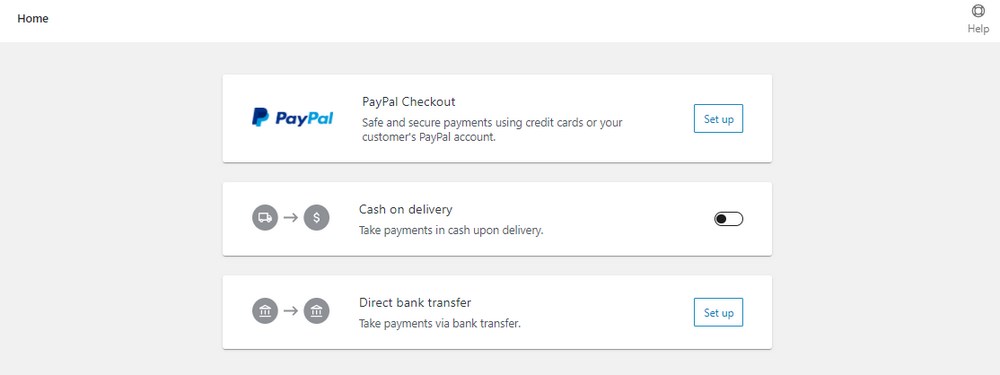
Alternatively, you can set up your payment options by going to WooCommerce > Settings > Payments:
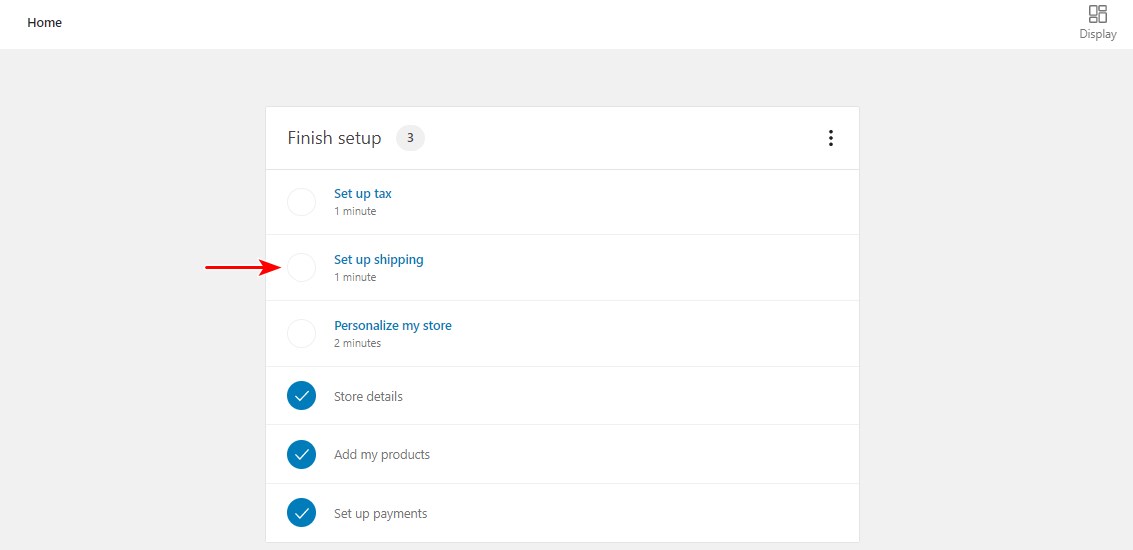
10. Set up Shipping
Go back to WooCommerce > Home. Click on 'Set up shipping':
Add the shipping cost:
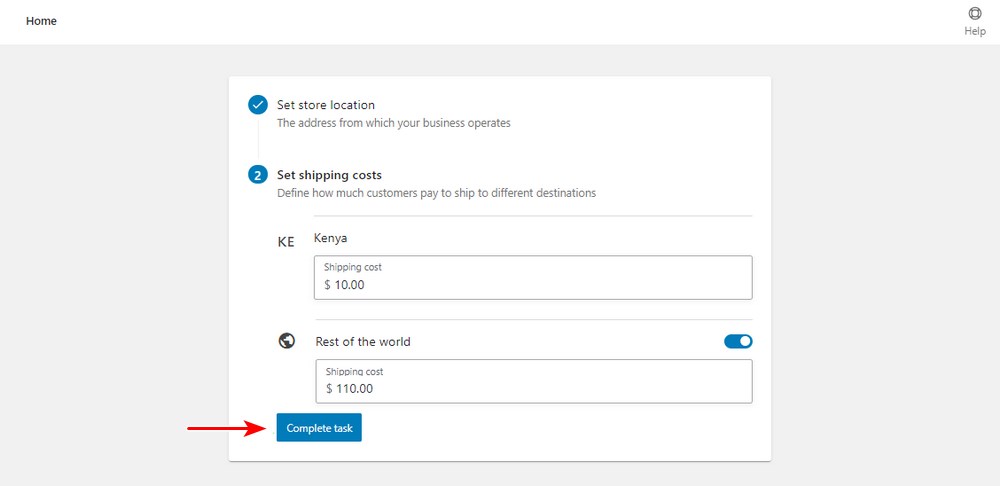
The shipping cost depends entirely on the zones you want to cover and the products you'll sell. If you're not sure about the shipping costs, we recommend checking your local post office rates. You can also change these numbers later.
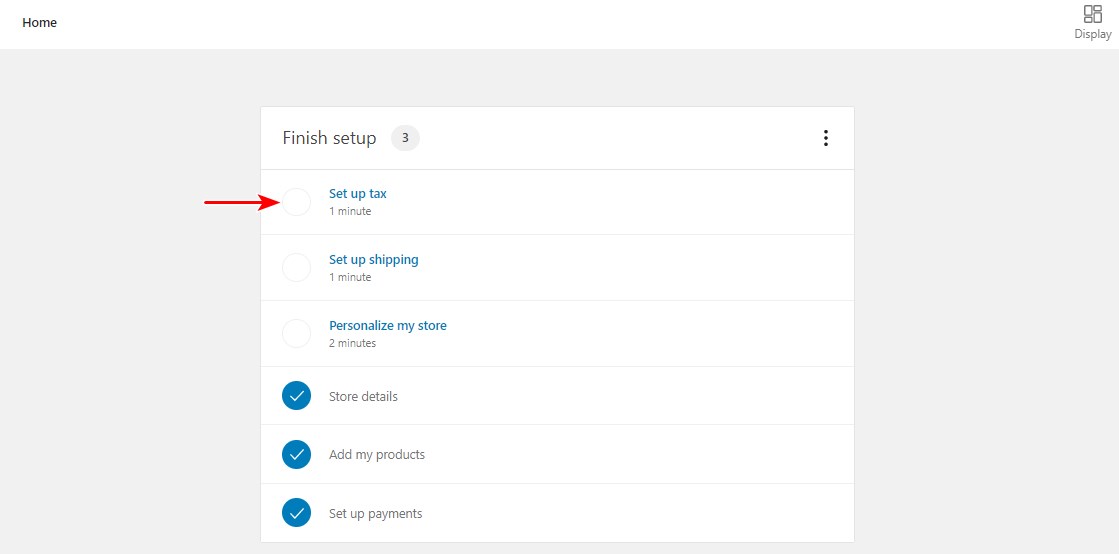
11. Set up Tax
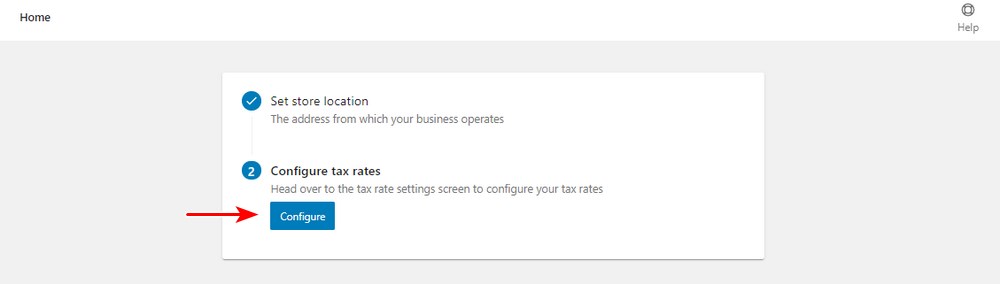
Go back to WooCommerce > Home. Click on 'Set up tax':
Click on 'Configure':
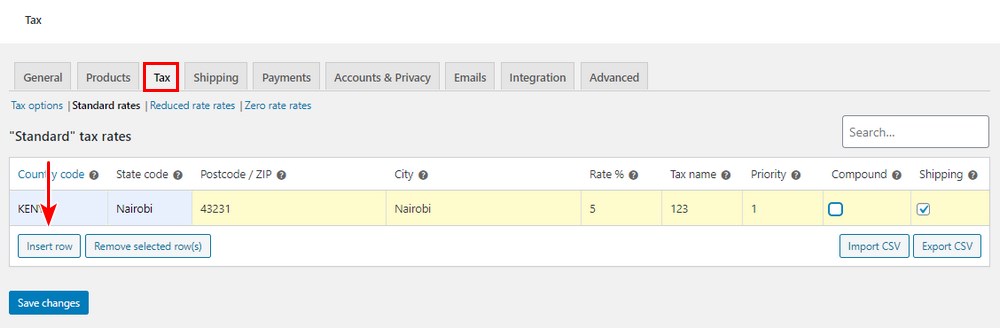
Insert a new row and add the relevant tax details. Remember to click on 'Save changes' when you are done:
12. Check That WooCommerce Is Configured Correctly
At this point, you've configured everything needed to start a WooCommerce store. Before you proceed to customize your store, check that everything is working correctly.
By default, WooCommerce automatically generates several pages required by your store. They include Shop, Shopping Cart, and Checkout pages:
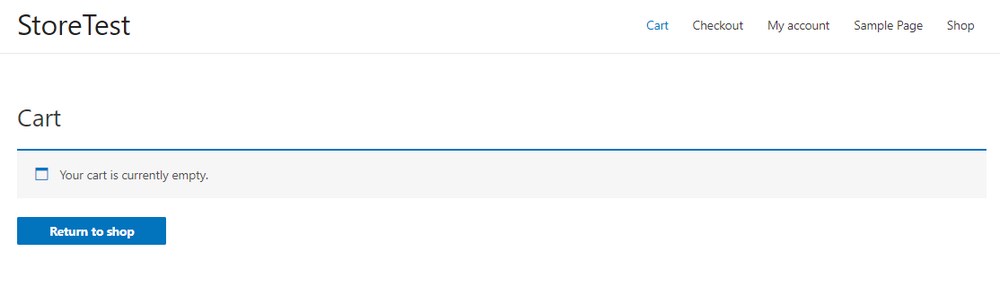
You should note that this is a barebones WooCommerce installation. There's still a lot of work needed before you can start selling your products.
To make further changes to your WooCommerce settings, go to the WooCommerce > Settings screen. You'll find options to change your tax, shipping, payment, and email settings.
You can also extend the functionality of WooCommerce using plugins.
13. Extend Functionality Using Plugins
To further customize WooCommerce, you can use WordPress plugins. Plugins are applications that allow you to add new or extra features to your online store.
There are many free and paid plugins available that you can use.
Since you are starting an online shop, you need to optimize your store for more sales and revenue. We recommend the CartFlows plugin.
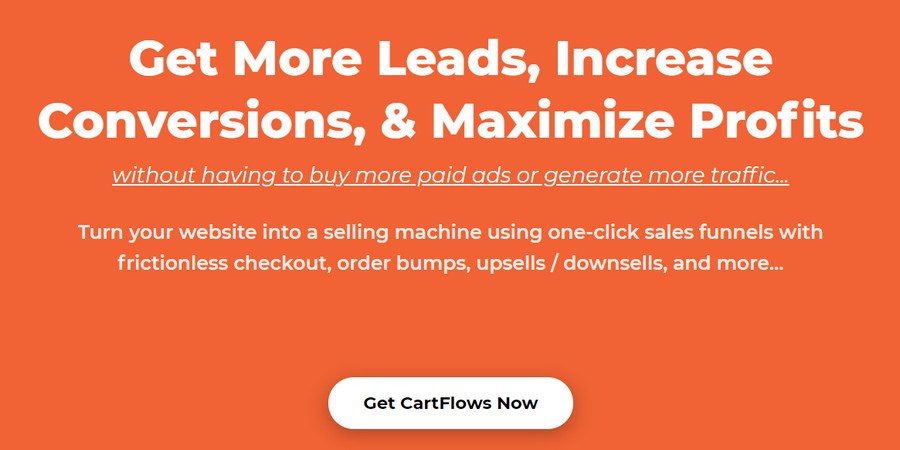
CartFlows allows you to build a complete sales funnel. A sales funnel is the journey your leads take to get from awareness of your brand (the widest part of the funnel) to conversion and beyond (the narrow end).
This plugin integrates seamlessly with WooCommerce and lets you use a collection of pre-built pages you can import with a single click.
Here is a summary of what the plugin has to offer:
- Pre-built sales funnel pages for your online shop
- It has funnel optimization for both the pre and post-sales stages
- It integrates with WooCommerce and all its official extensions
- It offers full customization options for each step of your sales funnels
- It has a 'frictionless checkout' to minimize distractions
- It allows you to target cart abandonment to regain lost leads
- It enables you to upsell and offer discounts incorporated into the checkout process
The license for the premium version starts at $199 per year.
Wrapping Up
From this tutorial, you can see that setting up WooCommerce isn't too difficult. WooCommerce allows you to build your store with complete control over how it looks and feels.
It is packed with many options to build your store, sell products, take payments, and manage deliveries. It provides everything to have a successful online store.
You can also extend the functionality using other plugins like CartFlows. CartFlows allows you to build a complete sales funnel.
Your determination and creativity will help you to land sales. It's only when you dig deeper into the plugin's many options that its true power is revealed.
Is there any important point we've missed? If so, please feel free to let us know in the comments section below!
How To Create A Store Tab On Wordpress Blog Woo
Source: https://wpastra.com/how-to-set-up-woocommerce/
Posted by: dixonsatereat.blogspot.com
0 Response to "How To Create A Store Tab On Wordpress Blog Woo"
Post a Comment